1. Introduction
This document outlines the steps to configure a PostBack URL within the MyXspend portal. A PostBack URL enables MyXspend to notify merchants about transaction status updates in real-time.2. Overview
To receive transaction status updates via a postback request, merchants must configure their PostBack URL within the MyXspend portal. When a transaction reaches a terminal state, MyXspend will trigger an HTTP GET request to the specified PostBack URL, appending relevant query parameters.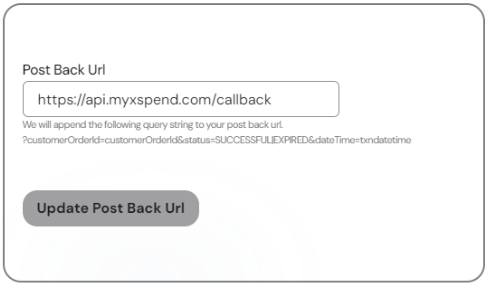
2.1 PostBack URL Query Parameters
The following query parameters will be included in the GET request:- customerOrderId: The unique transaction identifier provided by the merchant in the
/payment/processAPI request. - status: The final status of the transaction, which can be one of the following values:
SUCCESSFUL: Indicates that the transaction was completed successfully.EXPIRED: Indicates that the transaction was not completed within the allowed time frame.FAILED: Payment failed (e.g. invalid card, failed KYC).
- dateTime: The date of successful payment in
YYYY-MM-DDformat (GMT timezone). If the payment failed or expired, this will benull. - amount: The amount paid by the user. This may differ from the amount in the original /process request if the merchant allows flexibility.
- currency: The currency in which the user paid. This may differ from the original currency in the /process request if the merchant accepts multiple currencies.
2.2 Important Considerations
- If a transaction status is
EXPIRED, multiple callbacks may be received. - The
SUCCESSFULstatus is definitive and will not change. - Only HTTP GET requests are supported for PostBack URLs.
- Order of Parameters Matters: The query parameters must appear in the exact order shown above, and their casing must match exactly. This is critical for correct signature validation.
- Signed as a String: The full URL with parameters is treated as a single string before signing.
2.3 How We Construct the Payload
We generate the signed payload by taking the callback URL you provided in the MyXspend portal and appending the following query parameters:Example
If your registered callback URL is:✅ Successful Payment
❌ Failed Payment
2.4 Signature Key
To ensure the security of our webhook calls, we sign each payload using the HMAC-SHA256 algorithm and then encoded in Base64 format. The resulting signature is included in theX-Signature header of the webhook request.
We use your API Key to generate the signature. You can find your API Key either:
- On the MyXspend Portal, or
- In the response header of the Login API request.